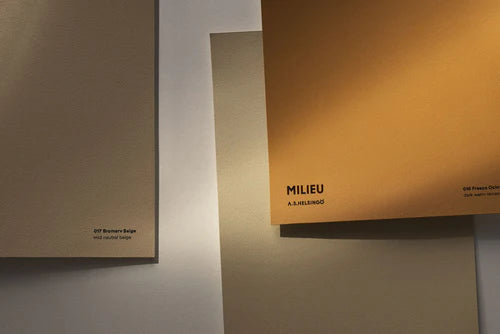
 Målade självhäftande provark: Prova enkelt hemma
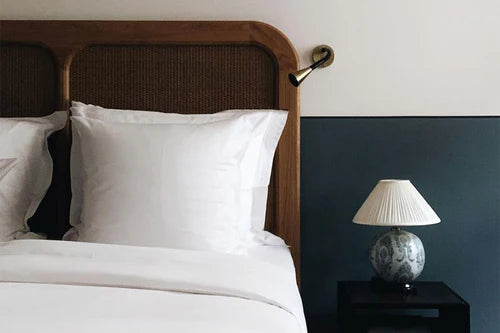 Proffstips: Tvåfärgad väg
How to paint the walls at home – tips from a professional painter
Do you want to create a new and beautiful color scheme in your home but have never held a roller before? With professional painter Paula Rautiainen’s tips you'll achieve a beautiful result.

Professional painter Paula Rautianen runs her own painting company that renews private homes, restores staircases in historically valuable buildings, and executes creative public spaces. She’s a true professional and has developed the Milieu paints with us. We met up with Paula and asked her if she had any tips for first-time painters on how to succeed when painting walls at home.
Paula, how should you prepare when planning on painting at home?
Reserve enough time. Painting is supposed to be fun; you shouldn’t be in a hurry. It’s probably not a great idea, for example, to start painting on a Friday night after a long day at work. For a professional painter, it only takes a day to paint one room, but I'd recommend reserving two days for it if you’ve never painted before. It’s also important to have good lighting when you paint, so preferably do it during the day.

What supplies do you need to paint a wall?
A good set of painting supplies makes everything easier. You’ll need two different-sized rollers, an extension pole, a paint tray, a brush, and masking tape. It’s also good to get each color its own set of rollers and brushes so that you don’t have to wait for tools to dry after you’ve washed them before you can start painting the next color. I also recommend getting an extension pole for the rollers. Just remember to be careful when using it so that you don’t accidentally hit the ceiling with the roller when painting.
3 reasons to use an extension pole
- You’ll get a smoother result
- Your arms won’t get as tired while painting
- You’ll be able to paint the whole wall without a ladder
How should you prepare the walls before you start painting?
It’s good to wash the walls with, for example, a mild detergent solution the day before you paint. Dust and soot accumulate on the walls in cities especially, and greasy soot requires a detergent that dissolves it.
After the wall has been washed and dried, level it by filling in nail holes and other irregularities. Paint over the plastered areas with one layer of the paint you plan on using on the wall after the putty has dried. If you skip this step, the filled spots can be visible after you have finished painting. This is because putty absorbs paint differently since it is more porous than the painted surface. If, on the other hand, you are repainting the wall a new color and still painting two coats, you don’t need the third coat on the plastered spots.
Tip: Paint plastered areas before painting the wall.
Why is it important to protect the surfaces?
By protecting the surfaces in the room you are painting, you’ll achieve a neat result. It's one of the most important steps when painting, and it can easily take up to half a day to do. It’s good to reserve more time for protecting the surfaces than for painting.
Carefully mask the moldings, circuit breakers, and electrical outlets with masking tape before you start painting. You should also protect the floors with protective paper or cardboard.
How do you correctly spread the paint on the wall?
The painting itself consists of three stages:
- Masking
- Spreading the paint
- Evening it out
Start by masking the edges of the walls and the ceiling border with tape. After that, paint the masked edges with a brush.
The next step is to first roll the roller with the extension pole evenly in the paint tray and then on the wall.
The most common mistake beginners make is that they don’t have enough paint on the roller, which will make the result streaky. You have enough color on the roller when you don’t have to push it but can let the roller do the job for you. If you have too much paint on the roller, it will start to drip.
I recommend that a right-handed person starts from the left side and continues to the right. If you’re left-handed, do the opposite. By doing this, you’ll leave the wet, painted surface behind you. Spread a good amount of paint on the wall with a roller in a zigzag pattern, starting from the side. Not in the middle of the wall as shown in some advertisements.
Continue to do so consistently, about one meter at a time. By moving the roller in different directions, you’ll be able to spread the paint evenly over the wall. If you must push too hard with the roller, you don’t have enough paint on it.
Tip: Spread the paint in a zigzag pattern
How do you achieve an even result?
As a professional, I paint the whole wall at once, but for a beginner, I recommend spreading paint on about one meter at a time and then even it out by rolling from top to bottom. At this stage, you don’t need to add more paint or push the roller, it will do the job for you.
Continue being consistent at this stage. Avoid evening out the paint in both directions, and only do it going from the top downward. In some instructions, they recommend to even out the paint going from the bottom up, but in my opinion, it makes the job heavier and harder. The roller comes down with its weight when you do it from the top down.
Three of the most common mistakes that result in a streaky wall:
- You don’t have enough paint on the roller
- You even out the paint in different directions
- You improve on the painted wall after you have evened out the paint
Tip: Even out the paint by rolling from the top down.
How many coats of paint do you need?
One coat may be enough if you paint the same color on old paint. If you change color, two coats are needed. Yellow and some darker colors may even require three coats.
Remove the masking tape immediately after you’ve finished painting the wall. This way, you avoid the paint drying on the tape and then tearing the painted surface. You don’t need to remove the tape if you plan on continuing painting the following day, of course.
Tip: Remove the tape immediately after you have finished painting to avoid damage to the painted surface.
What if the result isn’t perfect?
Don’t try to even anything before the paint has dried, even if the wall looks streaky. You don’t need to mask anything again if the result is uneven, but repaint the entire surface with a roller. It doesn’t matter if you can’t reach all of the most difficult spots, since you won’t be able to see the line.
Practice makes perfect, and before you know it, you’ll be an expert in painting walls and able to express your style through it.